 |
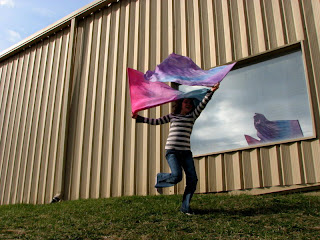
| photo with lines, also works for experimenting with light |
Monday, March 28, 2011
Scavenger Hunt favorite taken by Allison Carter
Scavenger Hunt favorites taken by Laura
Scavenger Hunt
Scavenger Hunt
1. Something very small 10 pts ________
Wednesday, March 23, 2011
BCC -Basic Camera Class - Week #3 of 4 Shutter Speed- Allison's photos
 |
| Shutter speed 1/500 |
 |
| Shutter speed 1/1600 |
 |
| Shutter speed 1/500 |
 |
| Shutter speed 1/400 |
 |
| Shutter speed 1/320 |
Aperture Fun - Josh Q
Tuesday, March 22, 2011
Slow It Down! Shooting At 1/20th Of A Second (With 15 Examples)
Here is a good article on slowing down your shutter speed.
Laura
BCC -Basic Camera Class Week #3 of 4 Shutter Speed
 | ||
| by Leah shutter 1/160 |
 |
| by Leah shutter 1/160 |
 |
| by Leah shutter 1/160 |
 |
| by Liam shutter 1/100 |
 |
| by Ann Marie shutter 1/100 |
 |
| by Ann Marie shutter 1/100 |
 |
| by Katie shutter 1/200 |
 |
| by Katie shutter 1/200 |
 |
| by Josh Q shutter 1/20 |
 |
| by Josh Q shutter 1/20 |
 | |||
| by Josh Q shutter 1/20 |
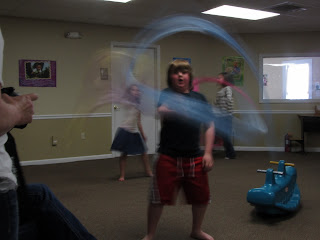
Faster shutter speeds stop or freeze action as in a racing car zooming by would be sharp with a fast shutter speed. A hummingbird's wings moving would appear sharp when they are moving very fast. Our example in class for fast shutter speed was 1/100 and 1/160 and 1/200.
It is fun to think before taking the photo, what action or movement do we want to show in our photos. Make a creative choice by shooting moving subjects with both fast and slow shutter speeds and see which result you find most pleasing. This is what we tried in class by changing the shutter, to see which effect we liked the best: to stop or freeze action or to purposely blur the action.
Playing with shutter speed
Wednesday, March 16, 2011
Aperture

Aperture is the size of the shutter opening within the camera. This opening controls the Depth of field. Aperture readings are represented by numbers 30-1.2. The numbers depends on the camera and/or lens you are using. Aperture is part of the formula when using full manual.
Most cameras have an aperture priority this is the beginning of gaining more control as the photographer.

The Larger the opening (2.8 small number) the shallower the depth. This gives you a blurry out of focus background. You can even get things like only part of a subject in focus. This shallow
depth also allows to use the camera in lower light. Why would you want to do this?
To simplify a photography, To draw attached to what you want to be your focus
Small # Shallow depth...less in focus. Check out the picture above this paragraph for an example.

The smaller the opening think (22 larger number) the larger the depth. The larger depth give that crisp focus. Think about a landscape you want the whole photograph to be in focus. You would want to have a tripod to get the steady crisp picture. Less light in the camera means longer exposure. The photography of the landscape above is an example of a great depth of field. So more of the photography is in focus.
This large # sharp pictures wide(large)depth...more in focus
Ansel Adams used to sit for hours waiting on the right light and everything to line up to take his Photographs. Just a note.
Depth of (DOF) is the distance between the nearest and farthest objects in a scene that appear acceptably sharp in an image. Although a lens can precisely focus at only one distance at a time, the decrease in sharpness is gradual on each side of the focused distance, so that within the DOF, the unsharpness is imperceptible under normal viewing conditions.The DOF is determined by the camera-to-subject distance, the lens focal length, the lens f-number, and the format size or circle of confusion criterion.

Now its your turn to try out the aperture mode. Use it to change the depth of field. Try lining up something you have in your home like crayons, bottles, etc. Then do a photo were they are all in focus then use a smaller aperture setting like 2.8 and only get some of the items in focus. Don't forget to watch your shutter speed number if it is less than 1/60th( it may just say 60 on your readout) of a second secure your camera by using a tripod or setting it on a table.
As you change your aperture # your shutter # is moving at the same time to keep expose if you are using AP or AV mode. So remember to watch that shutter speed# as well. If your inside use the light of a window. Next week Shutter Speed.
Post your photos.
Monday, March 14, 2011
3/13 BCC
Saturday, March 12, 2011
Framing

In our first class, we learned about framing.
Framing is a technique used to focus the viewer’s attention on the subject.
Framing also helps bring depth to a photograph.
Many natural objects can be used for framing: branches, tunnels, windows, archways, bridges, doorways, etc.
Here's some examples I tried to do at home:
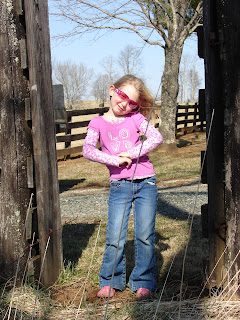
In the first two pics, I was using the neighbor's fence gate. I was unhappy when I saw how washed out Anna's face looked. But, as I'm typing I remember that Angela taught me in the 2nd class that it was better to take pictures in the shade or on a cloudy day. (I was taking the pictures in direct sunlight.) So, I am learning already!
In the third picture, I tried using the trees to frame the subject.
In the 4th picture, I tried using our garage doors.
And finally, I tried a window frame. I was having difficulty with the lighting. How could I have helped with the lighting?
I would love to hear any other suggestions on how I could have made the pictures better. Thanks!


Friday, March 11, 2011
Experimenting with light and shadow
In my attempt to always try to see in new ways and try new things, I photographed a pregnant mom focusing on her beautiful pregnant shape in the shadow. Not certain at all if this meets any of our composition characteristics! I think it is interesting, but I am not sure why.
Comments?
Wednesday, March 9, 2011
Photography Guidelines
 Photography Guidelines are simple and extremely complex. What we went over just touched on the basic ideas of these guidelines. I recommend you study each guideline and check out the resource links below for each one.
Rule of Thirds
This is a way of breaking down your photography into sections to help you compose better photographs. Click the link below to learn about the Rule of Thirds in detail.Rule of Thirds Lesson
Composition: Balance

Balance in photography can mean lots of different things. For example it could be the balance of light, the balance of shapes, of the balance of weight in the photography. I am sure you could think of others.
Here is a great link that goes into details on balance.
Lesson on Balance
 photo by Angela Caldwell
Here is another great link that goes into details on lines.
Composition: Viewpoint(Perspective)
The point of view you choose will impact your photograph. I recommend you do a search for photography perspective or viewpoint to see what you can find. Here is a lesson that goes into depth on perspective.Lesson on perspective
Composition: Simplicity
We talked about using a simple background. I recommend searching photography guidelines simplicity and looking at images.Here is a link that goes into more detail on simplicity.
Lesson on simplicity


