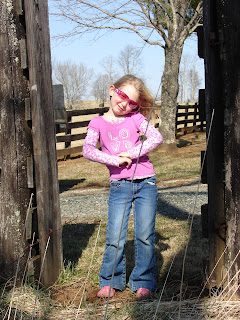
In our first class, we learned about framing.
Framing is a technique used to focus the viewer’s attention on the subject.
Framing also helps bring depth to a photograph.
Many natural objects can be used for framing: branches, tunnels, windows, archways, bridges, doorways, etc.
Here's some examples I tried to do at home:
In the first two pics, I was using the neighbor's fence gate. I was unhappy when I saw how washed out Anna's face looked. But, as I'm typing I remember that Angela taught me in the 2nd class that it was better to take pictures in the shade or on a cloudy day. (I was taking the pictures in direct sunlight.) So, I am learning already!
In the third picture, I tried using the trees to frame the subject.
In the 4th picture, I tried using our garage doors.
And finally, I tried a window frame. I was having difficulty with the lighting. How could I have helped with the lighting?
I would love to hear any other suggestions on how I could have made the pictures better. Thanks!


Thanks so much Katie, I love the barn doors that's my Favorite.
ReplyDeleteYes, you are learning already awesome. Another option as well is a diffuser disk. You can hold it yourself or have someone hold it for you.
Then on the barn doors pic you could use a reflector or if your on full manual overexpose to get more highlights.
Great Great job the more you take the more you learn.